
This post may contain affiliate links. Click here to read my affiliate disclaimer policy.
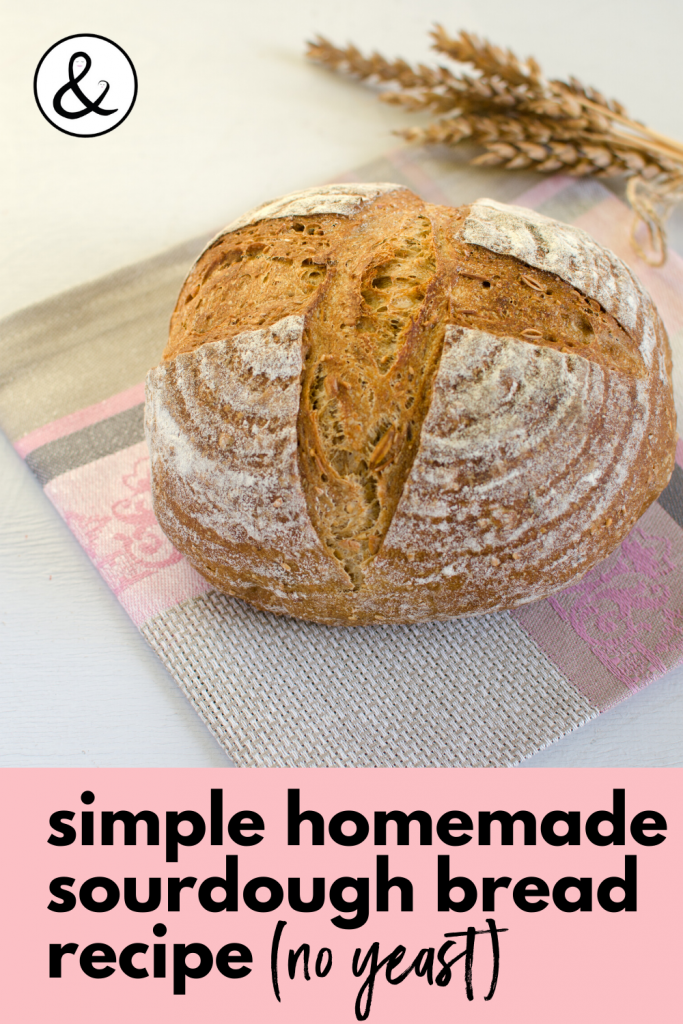
Here is a simple homemade sourdough bread recipe (no yeast). Sourdough bread is made from a sourdough starter. If you don’t have one or don’t know what the heck I’m talking about, no worries. I’ve included a recipe for making your own homemade sourdough starter too!
This is actually my husband’s recipe and it is simply the best! Sourdough is my favorite kind of bread and my kids love it too. We go through one loaf within a few days.
This recipe is for EVERYONE! Except chefs, bakers, and those who want things extra complicated. Life is already too complicated, why should bread be? Bread making should be SIMPLE. Bread is one of the earliest known human staples, so everyone should feel good about at least attempting to make a loaf of bread before throwing in the towel. What do you have to lose?
A few cups of flour is all, so don’t cry. Imagine if you had somehow messed up cooking 4 pounds of crab legs! It’s not the end of the world. You might think it is since there is no bread in the grocery stores right now. So now’s the perfect time to get started making your own sourdough starter and bread at the comfort of your own home!
The main point here is that sourdough bread making is a very forgiving practice, and sourdough can be used so many different ways from pita breads, bagels, tortillas, garlic breads, pizza (including deep dish pizza dough), biscuits, pancakes, waffles, you name it. A simple sourdough starter recipe should also be accompanied by a plain and simple sourdough bread recipe, which is posted right after, so keep scrolling!
Simple Sourdough Starter Recipe
- Put equal parts organic flour* and filtered water* into a mason jar. Any flour will do, really; most use all purpose flour, but bread flour will work great too.
- Cover with muslin cloth, paper towel, or kitchen towel and secure with rubber band or string.
- Let it sit on the kitchen counter for a few days or until bubbly.
Maintaining the Sourdough Starter
Every day or two, add equal parts flour and equal parts water. If you notice your starter getting a little doughy or dry, add a little more water than flour. If you notice your starter getting a little more runny, add a little more flour than water. Simple.
The starter is so forgiving! It’s not going to die all of a sudden like an indoor plant would. Just remember to show it some love once in a while. If you can’t, then stick it in the refrigerator for a week or so. When you pull it out, feed it some love, and continue. When you use your sourdough starter use everything but about a fourth cup of starter.
*Using tap water and/or non-organic flour will only add unknown variables that may alter the results.
Now it is ready to incorporate into a sourdough bread recipe!
Simple Homemade Sourdough Bread Recipe
For making sourdough bread, throw as much starter into a bowl as you can spare, reserving just about one fourth cup of starter in the mason jar for future batches. Remember to continue feeding your sourdough culture some love. Don’t forget about it. As for how much starter you should use, just play around with it! Personally, I like using a lot of sourdough starter to give the finished bread product a strong sourdough flavor. If you use a lot of starter, you’ll end up having to use a little less water. It’s just a balancing equation.
Ingredients:
- 2 Cups Sourdough Starter
- 3 Cups Flour
- 1 Cup Water
- Up to 1 TBSP Salt
- Brown rice flour (only if you have it)
Directions:
- In the bowl with the sourdough starter, add two cups of flour to start.
- Sprinkle about a tablespoon of salt in the bowl (use less salt if you’re turned off by it).
- Add only a half cup of water (filtered is best) to the bowl to start.
- Add a little more flour/water every other minute until the flour/water are all used up, and mix the ingredients together, either by hand or with a dough whisk.
- Knead and fold the dough for up to ten minutes. You’ll want the dough to be slightly moist, but not wet, and not dry. The dough should not stick to your fingers or rolling surface, and if it does, simply coat the dough and your hands with more flour.
- Once the dough becomes one nice smooth, elastic ball, it is ready to proof. Brown rice flour helps the dough to not stick to the bowl, and a good technique for applying the brown rice flour is to grab a couple tablespoons with your hand and just sprinkle it on top of the dough, grab the dough from the sides, then turn upside down and place in a deep, floured mixing bowl. Sprinkle some brown rice flour along the sides of the dough in the bowl.
- Cover with a damp cloth and allow about six to eight hours for it to rise. You’ll want the dough to about double in size, so it needs to be somewhere relatively warm, like near a sunny windowsill or on top of a refrigerator. Sourdough takes longer to rise than typical yeast breads. Depending on the variables, it may take up to 24 hours to fully rise.
- When you are ready to bake, follow this foolproof way to get a baker quality loaf of sourdough bread by continuing below.
Baking Your Sourdough Bread:
- Take your largest sized dutch oven (here is the dutch oven we use for bread making and for cooking anything really) with lid and place into your oven on the top rack.
- Set oven temperature to 500. Set a timer for 30 minutes.
- When timer goes off, lower oven temperature to 450.
- Remove dutch oven from oven, remove lid.
- Carefully dump the risen loaf into the hot dutch oven. Many times the dough will be sticking to the sides of the bowl. This is not a big problem to the non-chefs out there since it’s what’s inside that counts. Using a dough scraper or the brown rice flour (see step 10 above) will help it come out.
- Once the dough hits the hot dutch oven, take a sharp knife and cut an X or any other awesome symbol you want to help it open up in the oven.
- Place lid on the dutch oven, and then put the dutch oven in the oven on the top rack.
- Set the oven timer for 20 minutes.
- After the 20 minutes, remove the lid from the dutch oven. This sometimes involves carefully removing the hot dutch oven from the oven in order to remove the lid.
- Set another 20 minutes on the timer.
- After the 20 minutes is up, remove the dutch oven from the oven and turn it over to let the bread fall out onto a cutting board or cookie sheet.
- Let it cool. The bread should be nice and perfectly brown.
Amazon and the Amazon logo are trademarks of Amazon.com, Inc, or its affiliates.


Tabitha, I was so happy to find your simple sourdough starter and bread recipes! Thank you. However, I am a beginner to sourdough. I got the starter bubbling and saved 1/4 c as new starter. ?The remainder I added flour, water, and salt to make dough for the bread. I kneaded it until it was smooth, not too dry, not too wet. I put into bowl to proof/rise. Herein lies the problem (?). It IS rising, but it also has bubbles. Is that ok?
If I need to do something differently, please advise. Thank you. Thank you.
Hi Michele,
I am so happy to hear you are enjoying making sourdough bread. Sounds like you are on track and the bubbles in the rising dough is normal. These will create those air pockets similar to what you might see in artisan bread. I personally like them as they give it a nice unique texture which perfectly suits sourdough. How did your bread turn out? Can’t wait to hear about it 🙂
Tabitha
Well, it tasted ok but did not rise much even though I allowed 5-7 hours; can’t remember exactly but know >4 hours. Will try again later this year as traveling off and on until October. Perhaps by Thanksgiving I will get it perfected. Thank you Tabitha.
It definitely takes some practice but you’ll get the hang of sourdough bread making soon enough 🙂 safe travels!
I love that you recipe is so forgiving and not rigidly exact! It’s just my style! And it made a delicious loaf last time I baked. I’m using it again and doubling the recipe. I only have one Dutch oven and wondering what your suggestions would be for using a loaf pan or a baking sheet.
Thanks so much!
Hi Lee,
Thanks so much! I am glad you are loving the sourdough bread recipe 🙂 we do use small silicone bread loaf pans occasionally and it comes out more like a regular loaf-style bread which is great for smaller or larger batches (use two or three if you double the recipe). No kneading required, just make the dough and transfer to the silicone loaf pan/s to rise and then bake when it looks ready. Let me know how they turn out!
Best,
Tabitha
Thank you so much for this! I kept a starter going for about 7 years, and then forgot about it while our house was being remodeled. I’m trying to refresh my memory here — do you use a freshly fed starter for the bread, or a hungry one? I’m looking forward to getting a starter going again!
Tabitha, wondering if you could be a little more specific re making this recipe into a loaf of bread? I’m new to sourdough and this is the first recipe I’m trying. I don’t have a Dutch oven. I have long bread pans. I just the kneaded dough into the bread pan and placed in the oven on proof. Waiting for it to double. At that point, how would I go about baking it? Temp/time? Should I have greased my bread pan? Ugh. New to this whole thing, but would really like to make it work. Love the round loaves, but $400 for a Dutch oven is out of my budget at the moment. This looked like one of the easier recipes to try. Hoping really hard that it works:)
Hi Charlene,
Congrats on getting into bread making! It can take some practice to get better at making homemade bread but the loaf bread pans should do just fine! I would just follow the directions exactly except using your pans and see how it turns out. I haven’t yet tried this recipe in a loaf pan but if you find you need to tweak a few things, you will know for next time. Let me know how it turns out!
Cheers,
Tabitha
ok, I am going to try this recipe this weekend. I am thinking of the Red Mill Brand? We are limited on variety in my small town.
Hi Kristina,
Go for it 🙂 Let me know how your homemade sourdough bread turns out using bob’s Red Mill flour!
Cheers,
Tabitha
Hi Tabitha~~ a simple, clear, no-muss, no-fuss recipe is exactly what I needed!! This recipe is delicious AND forgiving! I put this together exactly as stated, with just two tweaks. First, I only had 3/4 cup active starter — I had to use discard starter from the fridge for the remaining 1 1/4 cups. Second, I work from home and didn’t have enough time to put the dough together AND knead it for 10 mins, so instead I mixed everything together (except the salt) and let it sit for about 30-45 minutes until I finished my shift. Then I went back, added the salt, and kneaded the dough and followed the rest of the recipe verbatim. I’M ESTACTIC!!!! I have never gotten my sourdough to rise and bake so beautifully!!! It’s in the oven right now and I keep going back and looking at it thru the window. The house smells amazing and there’s NO CHANCE I’m going to wait long for this to cool before I smatter some butter on a warm slice and devour this loaf. Thank you for an easy, flexible recipe!
Hi Lollie,
Yay I am so happy to hear this sourdough bread recipe is flexible and forgiving. We are the same way and cannot wait to cut into the bread right out of the oven 🙂 enjoy!
I found the bread rose better and had a nicer shape when I did a second kneading and proofing/rising. I also use parchment paper to keep it from sticking to the Dutch oven. Ovens are all a little different but I set mine to 450 off the bat—save a little on energy. It’s a lovely bread and I’ve been experimenting with the basic recipe to make whole wheat (really half whole wheat flour, half unbleached white) mixed with sunflower seeds and flax seed meal. It’s a denser bread but perfect for breakfast.
I kept adding flour as I was kneading because it was still so sticky. I hope I didn’t add too much